Greenbriar, Delta & Rutland
(GD&R)
An  N-Scale Empire want-a-be
N-Scale The Normal Scale©
     
Layout History
I've been running electric trains since I was about 6.  I received my first from Santa.  It was an Marx O27.  The next was an American Flyer S Scale.  I still have both of them and they both still run.  Of course there was a period when the trains didn't get used.  Girl friends, college, marriage, children, and that four letter word WORK all got in the way.

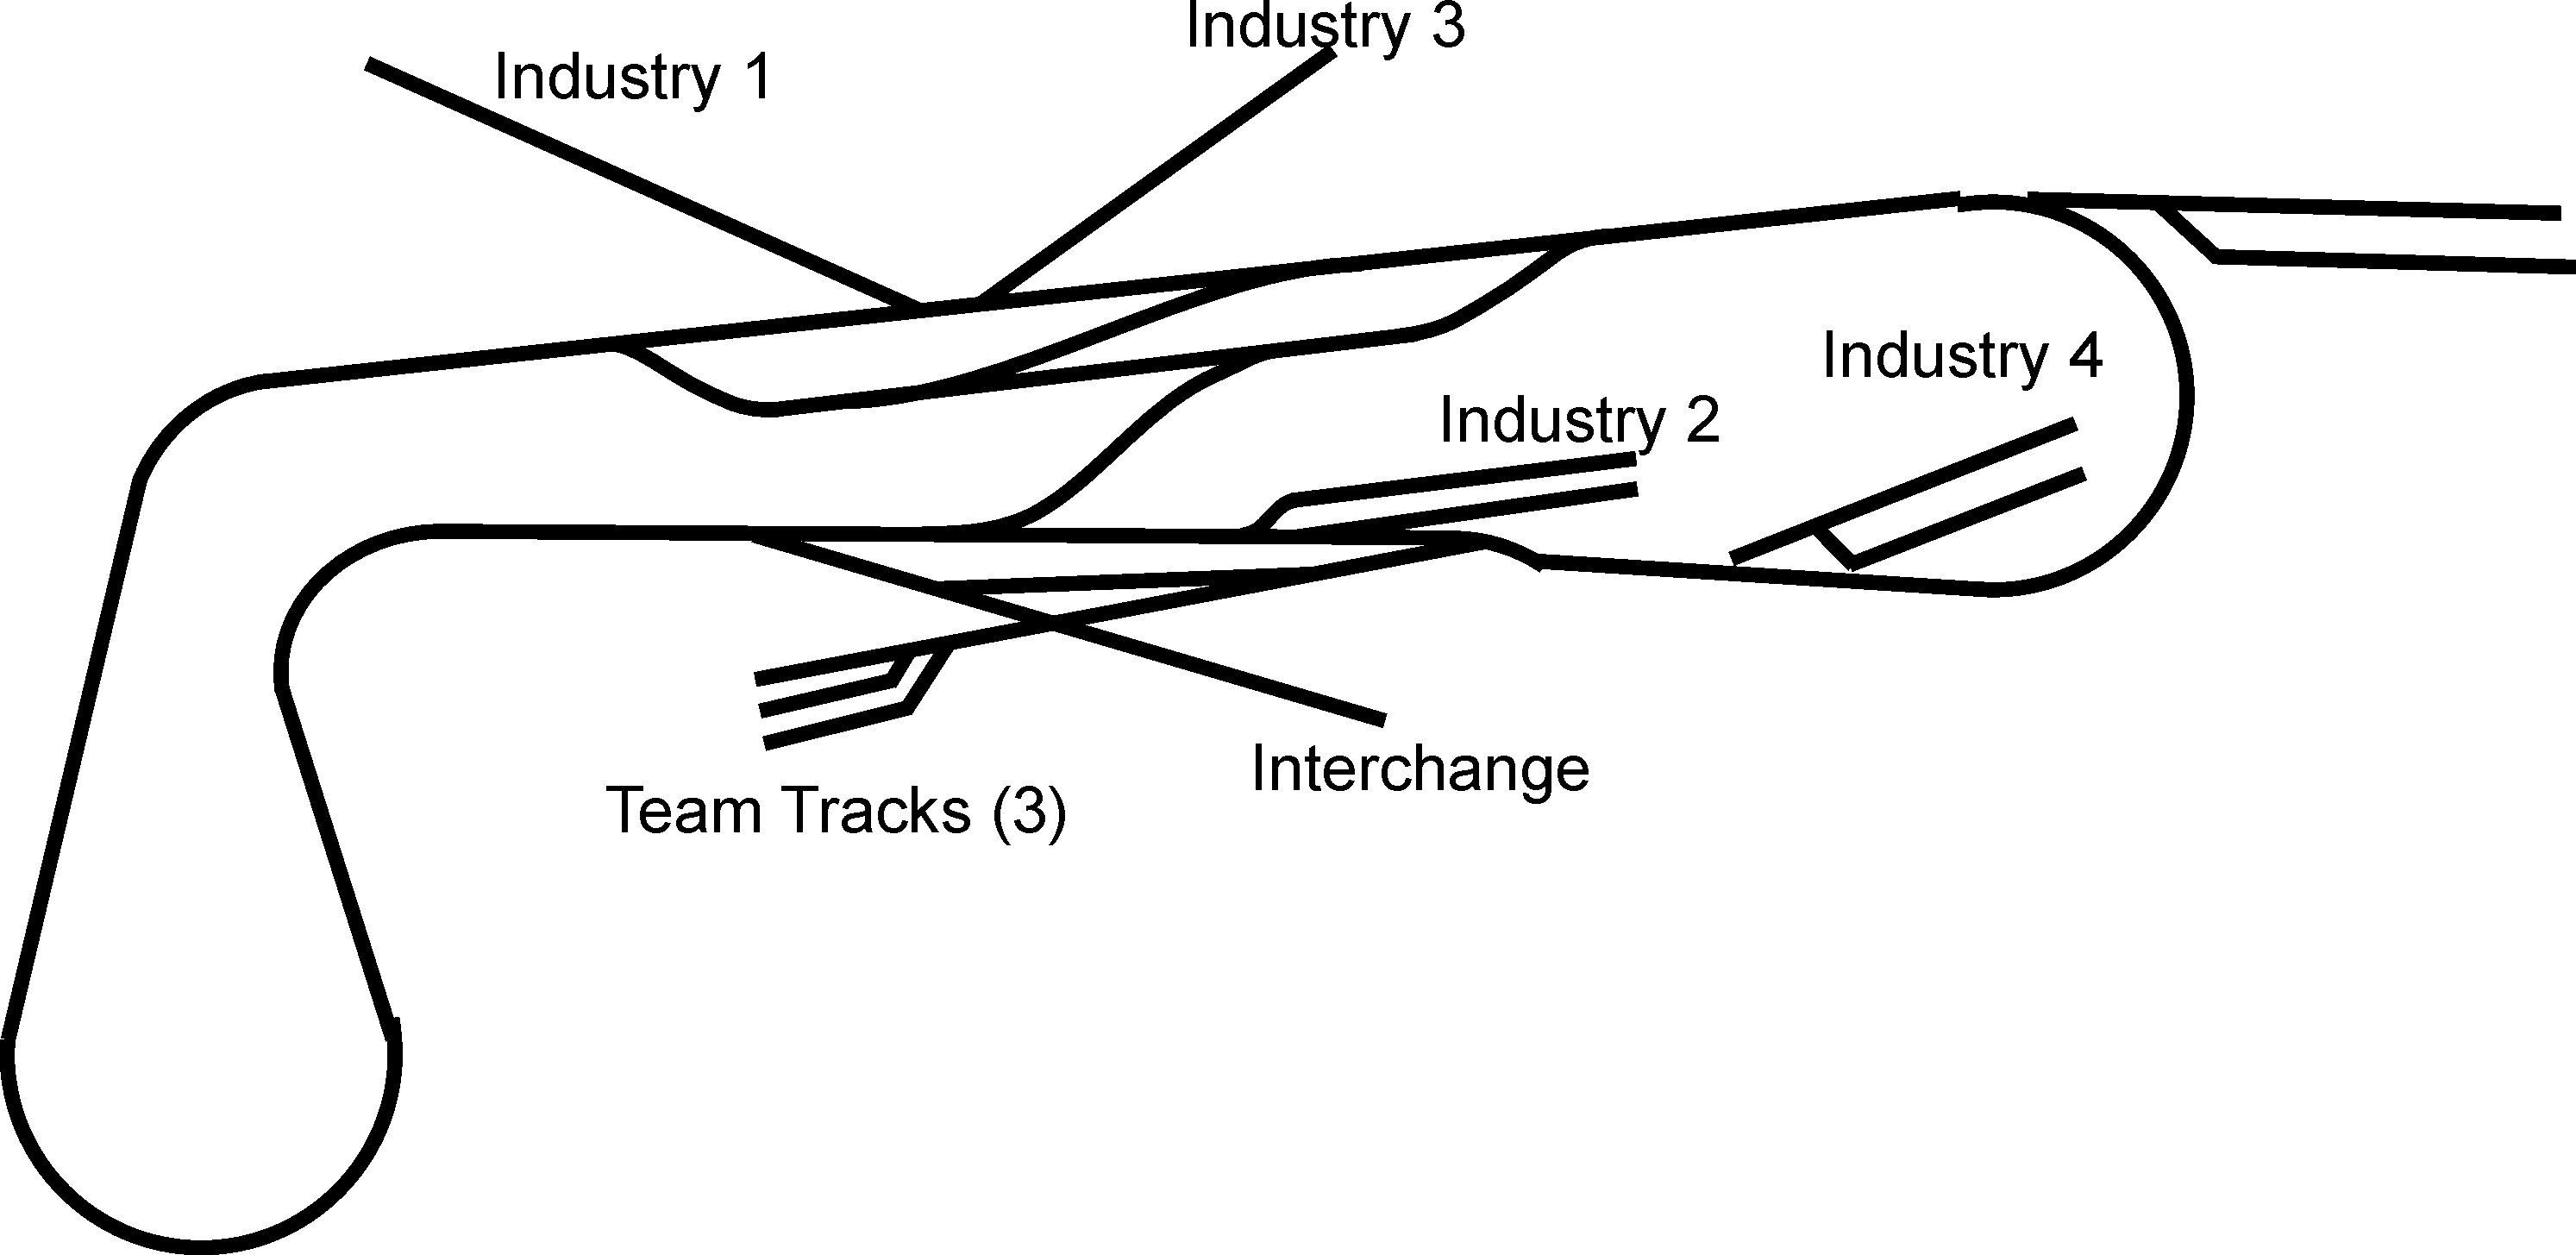
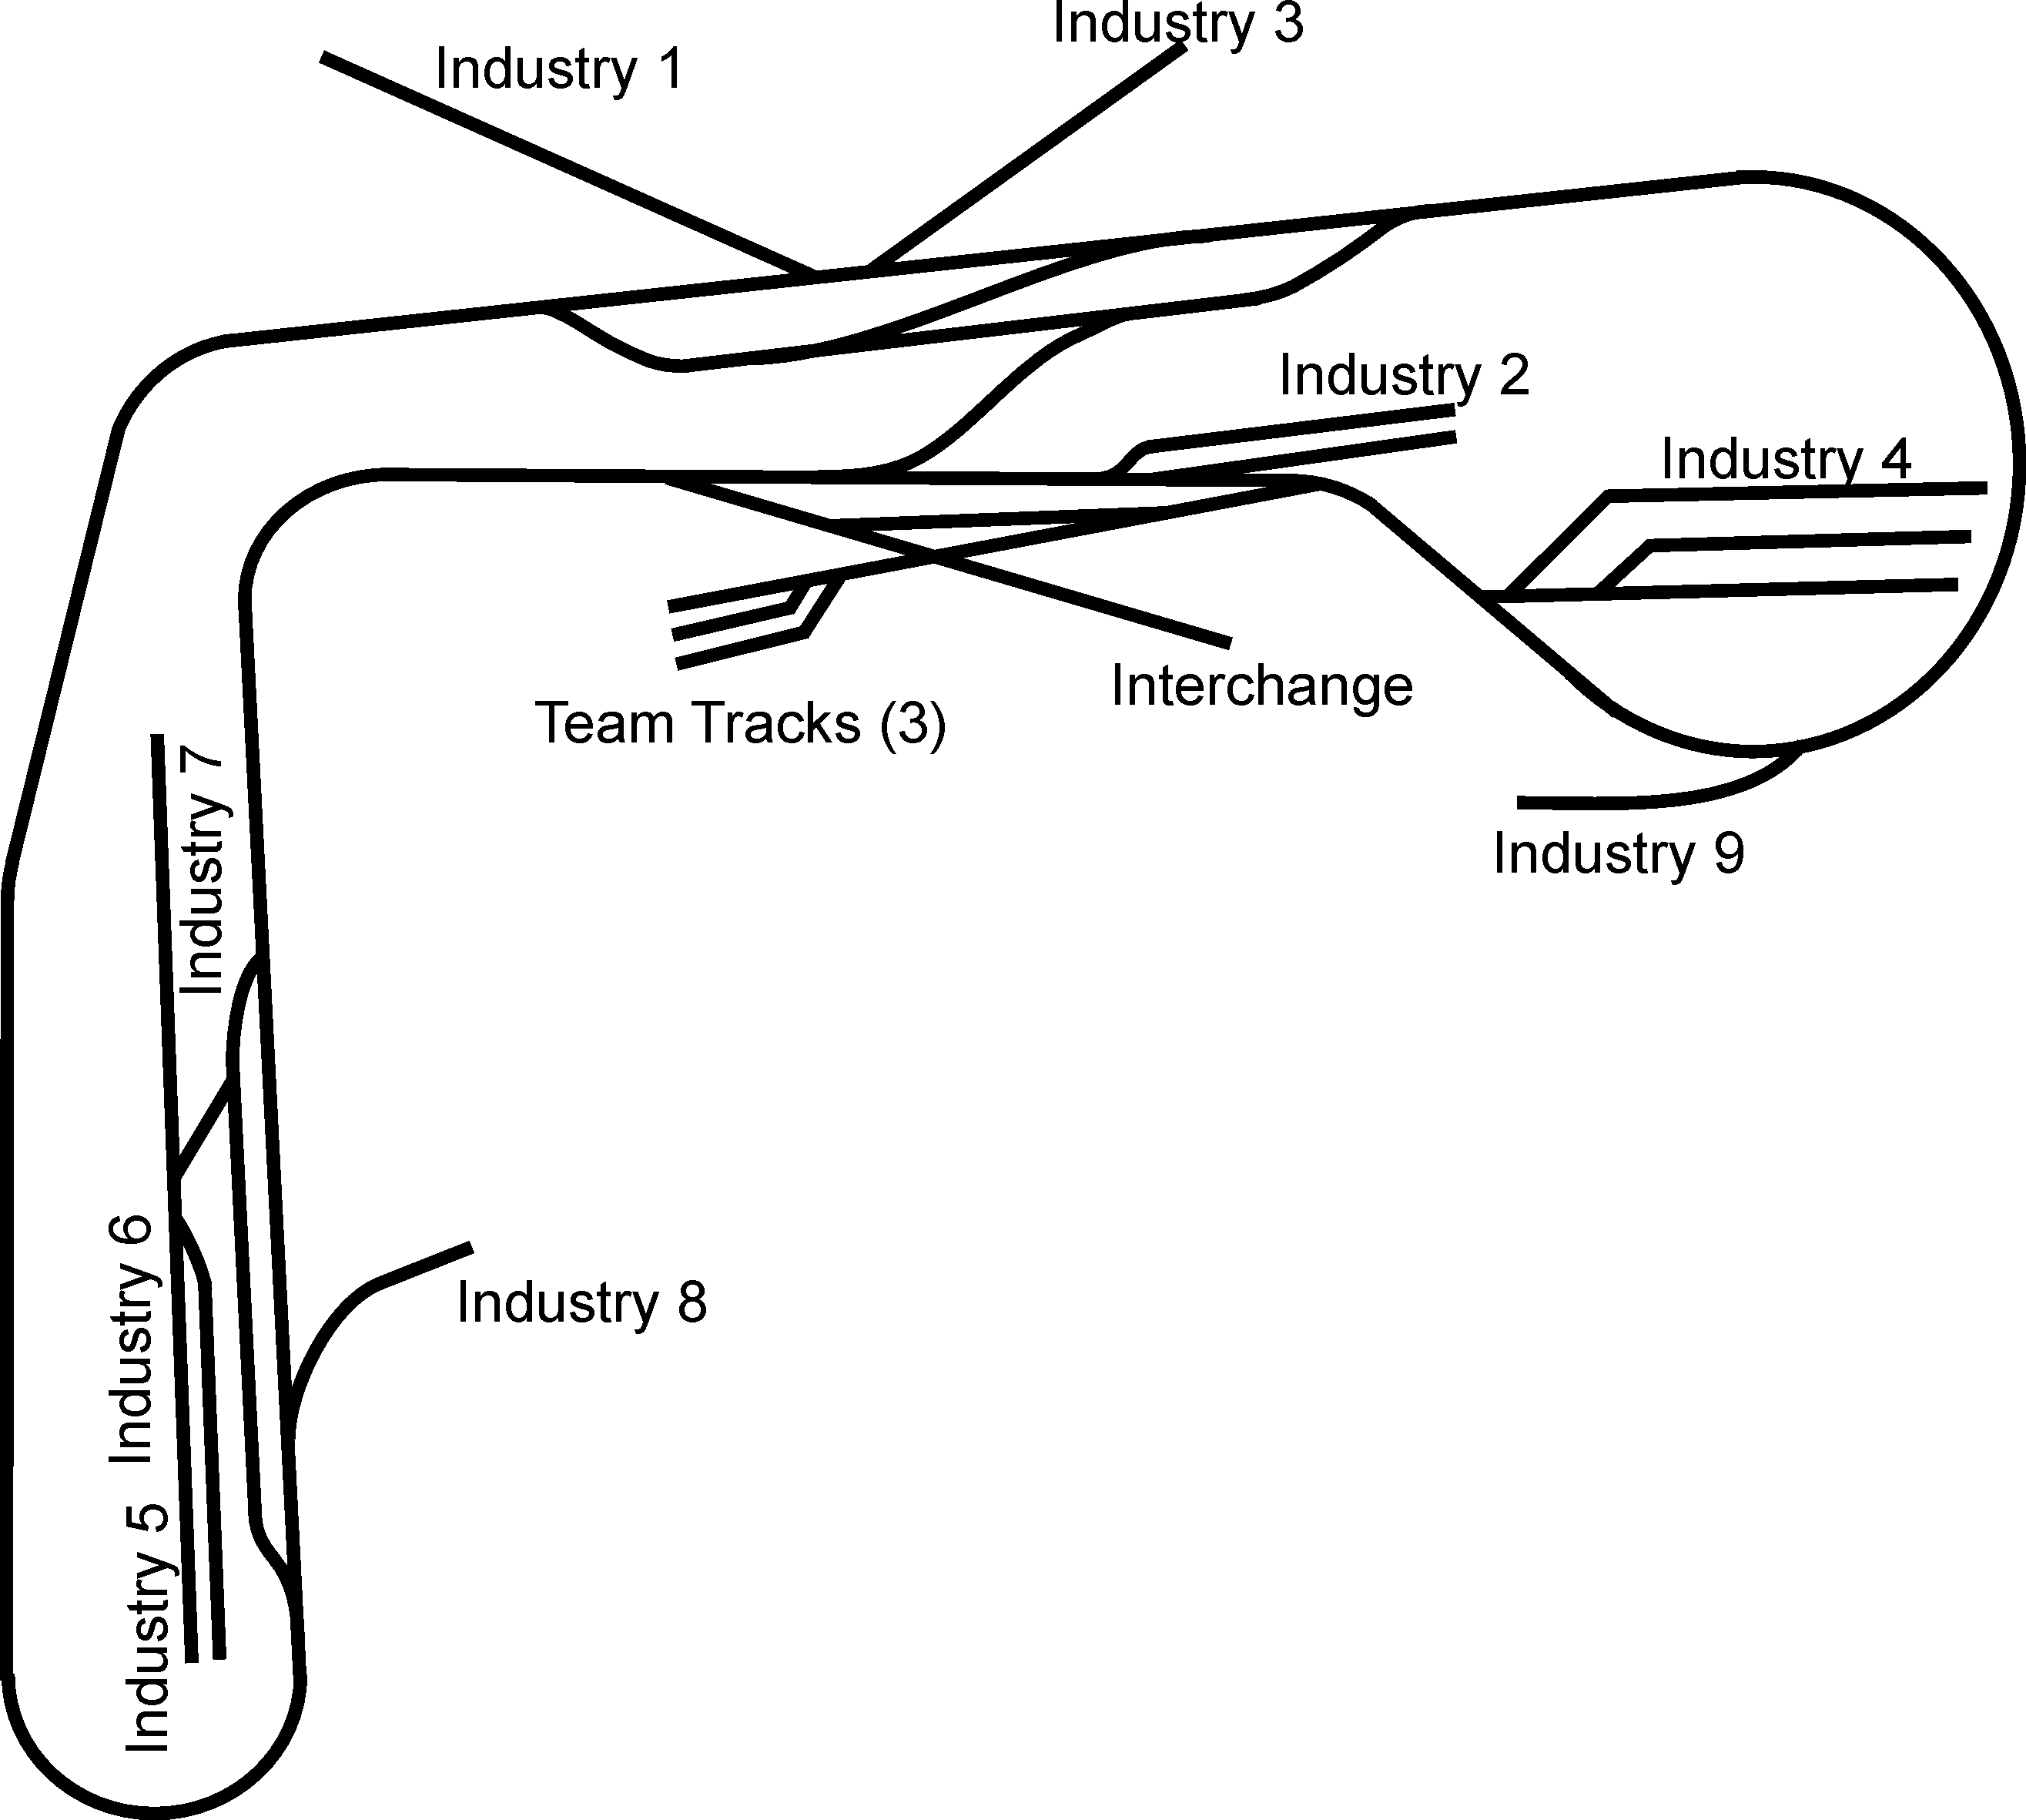
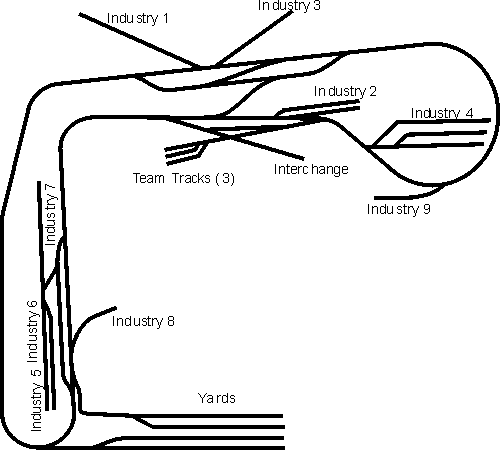
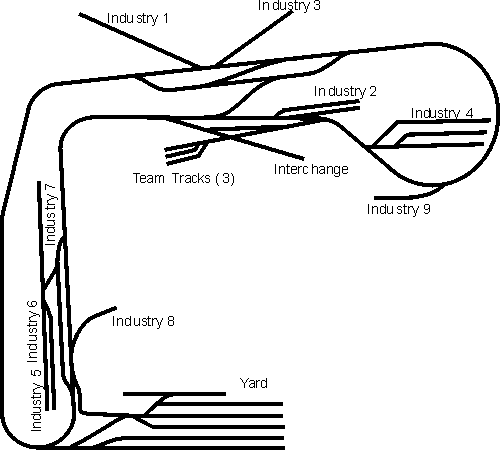
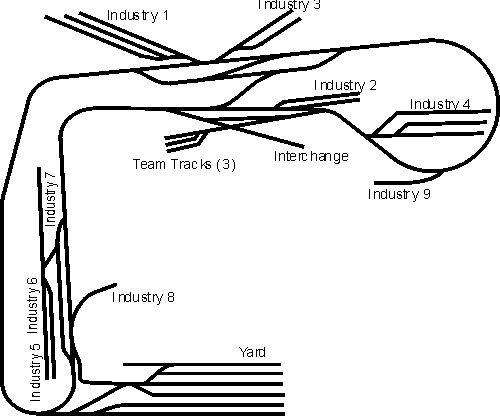
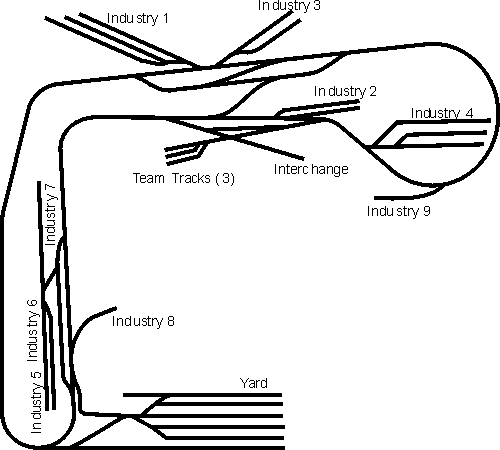
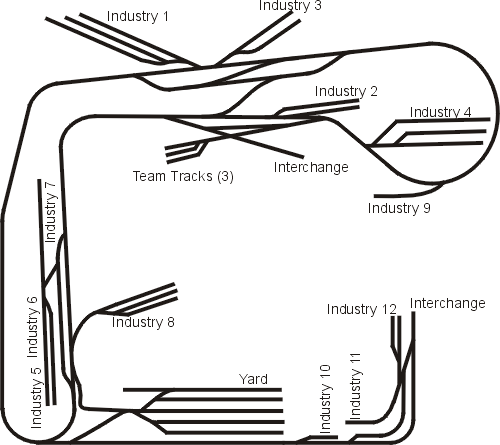
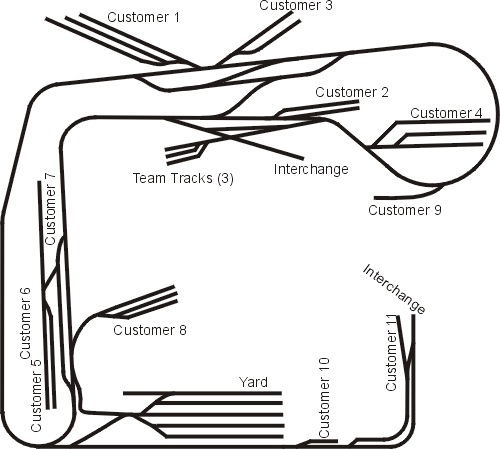
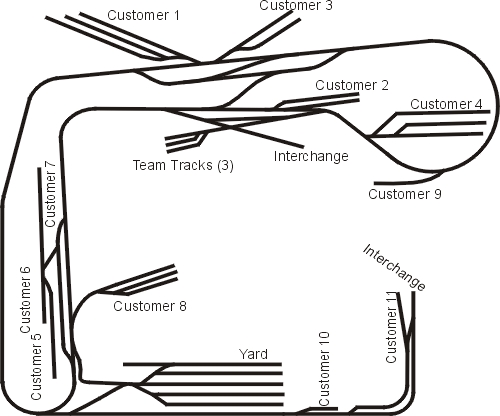
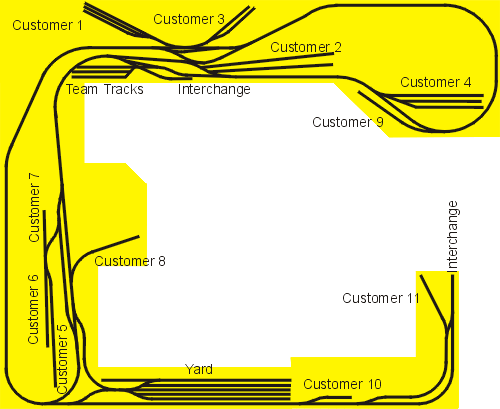
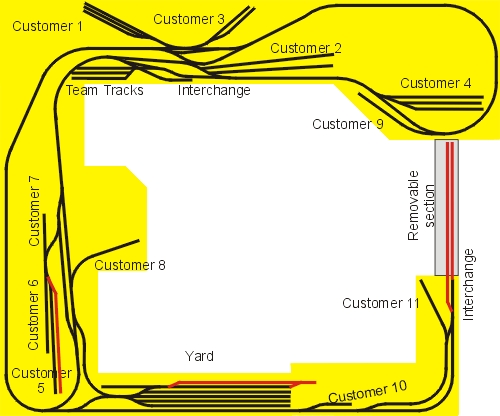
This is the 5th layout that I have started. Key word here is started

The first was on a 2X4 foot board in 1984 (loosely based on the N9 layout from Atlas).  It was for my son (at that time 7).  My brother in-law had given him an old at that time N-Scale set from Atlas.  My introduction to the Normal Scale.  My son lost interest in it very quickly, I fell in love with it.  Shortly after that we moved from an apartment to a house.

Second (1986) was some twisted, folded layout that was designed to be in some kind of cabinet that I attempted to expand it as a walk around.  The biggest problem with that layout was, because it was expanded in all three dimensions, I could not reach the inside.  This layout was short lived.

Third (1987) was started after the basement of the house was remodeled and I had a 22 X 12 room to work in. This layout was a dog bone that wrapped around and cut across the room with the ends on top of each other. It was about 18 X 12 with my office in the middle and under (the bench work went over my desk).

The 4th was started after stupidity in 1990 made me want to move 500 miles.  I now had an old house with a basement that my wife wanted nothing to do with (the basement and I'm not too sure about the house).  Out came the paper, pencils and all the needed tools to design a layout that had some miles (about 5 scale miles of main line track) to run. 

That turned out to be a 12 X 14 figure 8 with multiple duck unders not the 5 scale miles.  This layout was operated from within the top loop of the 8.  The bottom of the bottom loop of the 8 consisted of 9 staging tracks about 15 feet long due to the curves at each end.  Due to the age of the house and the unfinished basement (could not attempt to finish it due to the flooding even with the two (2) sump pumps I put in) the track was always dirty.  When someone walked on the first floor dirt fell on to the layout.  After a few years of neglect due to lack of time and other interests that layout went up in flames in December of 2002.  Due to the water in the basement (the layout was on cinder blocks to keep the legs out of the water, one day we had a 2X4 floating across the floor) the bench work was covered with mold and I did not feel it was worth using again.  Most of it had been used in the previous 2 layouts and had many screw holes.  Thus the burning.  I now have the water and mold under better control, I hope, but the basement still floods one or two times a year. With a dehumidifier running 24/7 I cannot get the humidity below 55%.

The fifth and current was started in July 2004.  It started out as an 8 X 4 ell (or a 7) 2 feet deep, based on an article in Model Railroader.  The article was based on John Allen's Time Saver.  The Time Saver is something that has interested me for a long time.  I put this layout in my office ( the smallest bedroom on the first floor, about 105 square feet) along the wall opposite of my desk.

Shortly after starting it I realized that I needed some place to have the trains come from and go to.  My original design did not have much operation other then moving through the Time Saver and switching Industry 1, 2, and 3.  No yard, no fiddle track, and no staging area.  I then added a loop at the right end of the 8 foot end staying within the 2 foot width and was able to add 2 tracks about 30 inches long off of the loop.   Next my wife comes in and says "you need to have the trains go all the way around so that the grand children can enjoy the trains too."  Next came a loop at the other end.  Now I had a continuous loop, a bent oval. Okay that gave me some running options.  Depart the staging tracks make a complete run around the layout before doing any switching of industries.  Reversing the route and a couple times around the loop and back to the staging area.

Shortly after that I added the team tracks, industry 4, and removed a track from Industry #2.  I was happy with the track plan and the size.  I started to bring out some of the buildings that I had built for layout #4 and built some more kits.  

Then came the earthquake in Oct. 2006 (read wife decided that she wanted the room that I was using for 10 years for my office and now train room for an exercise room).  We made a deal, the first.  I give up the room and I get the area upstairs just outside our bedroom to use as both office and railroad.  This was going to give me more real estate for the railroad and new office furniture.  The bad part was I could not use any of the current layout due to the shape of the area.  Before I was able to get the remodeling done upstairs and with the layout in parts in the wet basement it (the railroad) was evicted from the house.  Deal #2.  Some how I ended up with a building that is 10 X 12  made of steel and is insulated.  It arrived some time in January 2007.  We (wife helped) tiled the floor and I added electricity, telephone, Ethernet and moved the layout from the basement.  The events of disassemble,  moving down to the wet basement, storage, moving up the stairs, through the house, out the door, across the yard, into the Train Building, and then reassemble did not do too much damage.  Again the trains were running. 

The rest of the story can be found below and on the other pages within this site.

Layout at time of eviction and moving into the "Train Building."

Change #1 
I removed the loop at the short end and replaced it with about 6 feet of bench work with a small peninsula.  This added 4 more industries (5-8). (Spring 2007)

Change #2
The loop with the two staging tracks was changed to a section that is about 48 by 40 trimming back down to the 24 inches.  This provide an area for expanding industry #4 and add # 9 along with other scenery.  (Summer 2007)


To go to top of page

Change #3
Since change #2 did away with the staging tracks and about the same time a second article In Model Railroader gave me some ideas on how to handle the new problem.  Add four tracks off of the loop of track at the end of change #1.  Two each coming from different ends of the loop.  Operational plan now was to run as a point to point.  Small yards on different sides of the town. (Summer 2007)

Change  #4
 Added some tracks to the aisle side of the outside two yard tracks. (Fall 2008)


Change  #5
Added a cross over track to connect the two yards to make one.  New operational plan.  Now an out and back as will as a point to point. (Winter 2008)

To go to top of page

Change #6
Added two tracks to Industry # 1 and one to Industry #2.  At this point I think I have the track plan (again) where I want it.

Change #7
Extended the outside track of the yard to the match the length of the other tracks  of the yard. 

To go to top of page

Change #8
Relocated turnout from main to yard.  Yard is now 5 tracks (Winter 2008)

To go to top of page

Change #9 
Added a 48 X 40 inch ell off of the yard.  The 48 inch long section is 15 inches wide and the 40 inch section is 12 inches wide.  With this expansion 3 more customers are added. 

Added an 18 X 18 inch section to the peninsula.  This will extend the track at Industry 8 and add two (2) more tracks to the same

To go to top of page

Change #10

After a very horrible operating session that was concentrated on the new track on the Ell, I decided that I needed to redesign the track on the Ell. The result was removing 2 track switches, related track, and relocating a third turnout. These changes resulted in relocating the buildings used for 2 trackside industries to off track industries and replacing one with a smaller industry. The new industry (recovered from the last layout) brings new traffic to the layout. The interchange remains but is not labeled in the image

November 2008

To go to top of page

Change #11

Shortened the track at Customer 6. The reason was to move Customer 5 forward to make room for some scenery work behind both customers.

August 11, 2009

To go to top of page

Bench work as the fall of 2008
See the Construction Page for color key

To go to top of page

November 2009
Made Changes to bench work and track plan.

  • Rotated peninsula extension 180 degrees and relocated it.
  • Removed 2 tracks from customer 8

    To go to top of page

Proposed changes are (in red)

  1. Add a track at customer 5/6 area to be used as a switching lead for customer 7 and as a holding track
  2. Add a track to the aisle side of the yard with a switch (turnout) at the stub end as a loco escape area.
  3. Add a switch at the interchange near customer 11 and install derails in both tracks. These tracks will lead to the end of the layout and a removable two track staging area that will span the door way.

    To go to top of page

August 06, 2012

Latest Proposed changes

For a long time now I have felt that something is wrong with the layout. It felt unbalanced. I noticed that the "ell" at the bottom of the track plan was not getting the use I felt it should. Only one train would use that portion during an operating session and when the trains were just circling the loop it was not used at all. After some on again off again thinking and planning and some input from my friends on TrainBoard.com I have decided to make changes based on the image seen to the right.

My first thougths were to relocate the yard and run both legs of the extended loop below the relocated yard. Click here to see the first idea. The first proposed changes removed customers 10 and 11 and the "Y".

The end result as seen to the right took a little bit over 4 weeks and 8 different track plans. The curved switches have been ordered and are on their way. Some lumber has been purchased.

I'm still planning on the removeable staging/fiddle tracks as seen in the image above.

To go to top of page

August 07, 2012

I started working on the bench work required for my changes to extend the loop for continuous running. I extended the bench work to match the end on the top of the layou.

To go to top of page


The pink area is the added bench work

August 21, 2012

While working on the track for the changes I decided to leave the passing track

To go to top of page

 
To go to top of page